(Photo diary by Chris Holland)

Here are the instructions given to check/layout the parts needed to build the crankshaft, the natural
thing to do would be to put the parts as displayed, for one they are extremely complicated and difficult to follow.
As you can see by the table to the right some parts in the instructions have 3 references, for example (101E / Crank A / 2, 18) why not refer to it by its part number that is clearly marked on it Part no2. So why make it so hard?

Here you can see how much more simple it is if you just put all the parts into numerical order. The picture above is so much easier to follow.
Step 1

Step 2

Step 3

Step 4

Gently sand any paint off the main journals and the front and rear bearings.
Step 5:
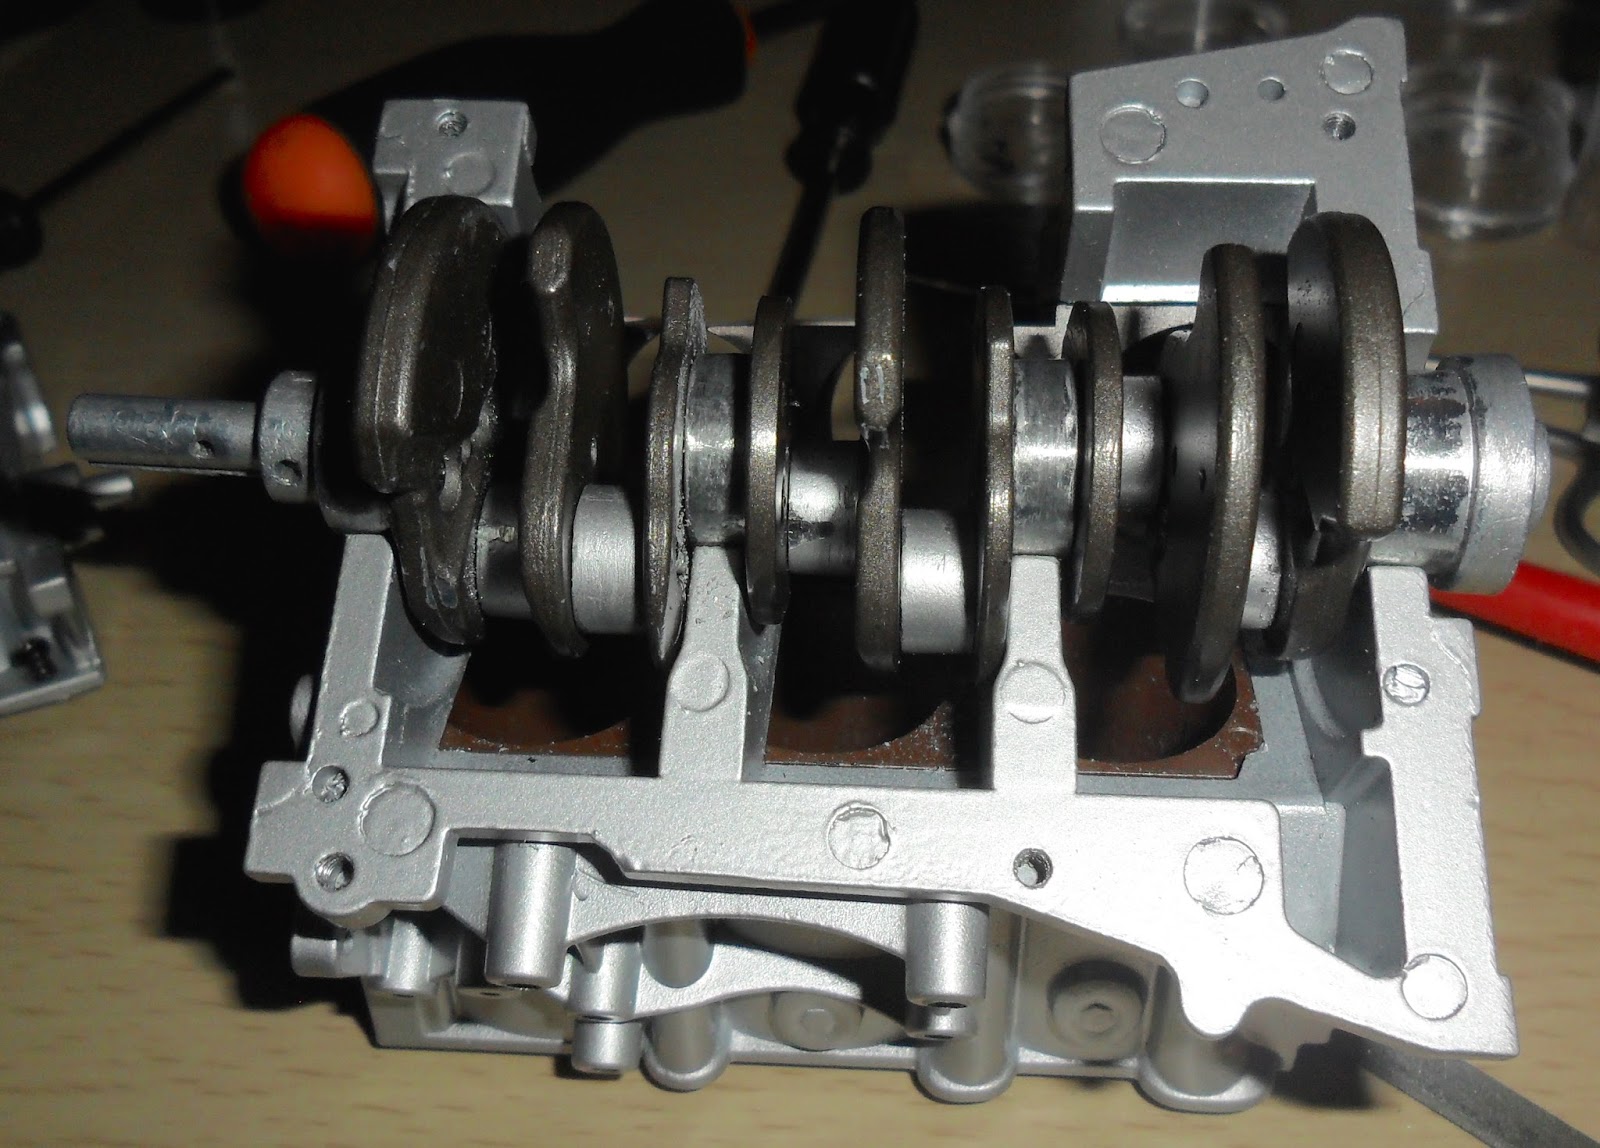
Now Place partially assembled crank in cylinder head to check for smooth rotation.


Step 7
Final step of building the crank, this should move smoothly within the cylinder head with little effort. Now that is the completed crank.

Now fasten on the crank girdle and you should be able to still freely move the crank with very little effort. If it is a little tight to turn or catching then when you remove the crank sand the paint off on the 4 points that the main bearings / journals fit. Once you are happy with the movement of the crank, grease all the bearings and the cylinder head and crank girdle as shown in the following
pictures (shown in red)


Once you have greased all the parts fasten everything together.


PISTONS
If you look closely at each part of the pistons they are clearly marked 1 – 6, sort all the parts into number groups and assemble in that way, all marked 1 together and 2 together and so on, as not all parts are identical. Also fastening the crank girdle on first makes adding the pistons so much easier because you can add 1 piston at a time not all 6 at once which is a nightmare unless you are an
octopus.
Starting with No1 as shown.

The insert piston 2 working 1/3/5 to the left side of the cylinder head and 2/4/6 to the right.


Here you can see each piston is attached 1-6 from right to left


Now add a liberal amount of grease to all moving part and everything will move freely.
No comments:
Post a Comment